Nestia Editor
@nestia/editor generates a TypeScript SDK or NestJS project from an OpenAPI document in your browser and delivers it as a ZIP download. Choose the project mode, package name and generation options, then extract the archive and install and run the project locally. Generated projects use the native Go-backed TypeScript compiler, so they require a local environment that can run that compiler.
Enable the mockup simulator to exercise the SDK without a backend, or generated e2e tests to include randomized endpoint tests. The downloaded files retain their paths and UTF-8 contents. An operation that @nestia/migrate cannot convert is left out of the project, and both the static application and the components list each skipped operation with its reasons beside the download, so an incomplete project is never presented as complete.
The examples below open project generators with simulation and e2e generation enabled.
The static application accepts keyword, simulate and e2e as query options. Each is enabled by true or 1; other values disable it. Query values take precedence over matching window settings, and an absent setting defaults to false. For example, ?url=...&keyword=false generates positional SDK arguments. When you use NestiaEditorIframe directly, omitted generation options default to true.
Concepts
SDK: collection of typed
fetchfunctions with DTO structures- Mockup Simulator: embedded backend simulator in the SDK
Demo Editors
The video shows the earlier browser playground. The current application downloads a project ZIP.
Frontend Setup
React Library
import { NestiaEditorIframe, NestiaEditorUploader } from "@nestia/editor";
import type { SwaggerV2, OpenApiV3, OpenApiV3_1 } from "@typia/interface";

function DocumentEditor(props: {
  document: SwaggerV2.IDocument | OpenApiV3.IDocument | OpenApiV3_1.IDocument;
}) {
  return <NestiaEditorIframe swagger={props.document}
                             package="your-package-name"
                             e2e={true}
                             simulate={true} />;
}

function UploadEditor() {
  return <NestiaEditorUploader />;
}
Install @nestia/editor and import one of below components.
If you’ve prepared the Swagger Document to serve, you can directly launch the cloud editor by using the NestiaEditorIframe component. Otherwise you want to provide a “Swagger File Uploader” for dynamic purpose, utilize the NestiaEditorUploader component instead.
NestiaEditorIframe: directly launch the cloud editor by given documentNestiaEditorUploader: upload theswagger.jsonfile and launch the cloud editor
Static Hosting
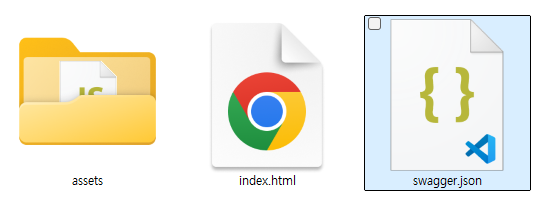
Unzip and place your swagger.json file into the extracted directory.
Download and extract editor.zip to serve the project generator alongside your swagger.json or swagger.yaml file. Open the hosted index.html in your browser to generate and download a project from that document.
Also, if you want to specify the package name, or activate the Mockup Simulator, open the index.html file of unzipped and edit some variables like below. Guiding the users th fill these package, simulate and e2e query parameters like http://localhost/?simulate=true&e2e=true can be an alternative way.
By the way, if you do not place the swagger.json (or swagger.yaml) file into the directory, the @nestia/editor will just show you the “Swagger File Uploader” (NestiaEditorUploader) instead.
Keep the downloaded page’s generated bundle reference and change its settings script:
<script>
  window.package = "@ORGANIZATION/PROJECT";
  window.keyword = false;
  window.simulate = false;
  window.e2e = false;
</script>
<iframe> Embedding
<iframe src="https://nestia.io/editor/?url={URL_ADDRESS}&package={NAME}&simulate=true&e2e=true"></iframe>You also can embed the @nestia/editor with static URL address.
When embedding the @nestia/editor application through the <iframe> tag, fill the url query parameter with the URL address of your swagger.json (or swagger.yaml) file. Also, the simulate and e2e query parameters are optional, but recommended to be filled with true for the best experience. As you know, they activate the Mockup Simulator and automatic e2e test functions’ generation.
Without a url query parameter, the application probes swagger.json and then swagger.yaml beside the page. If neither document is available, it shows NestiaEditorUploader.
If you wanna see the example cases of the <iframe> embedding, let’s see the below list again.
- BBS (Bullet-in Board System): https://nestia.io/editor/?url=bbs.json
- Shopping Mall: https://nestia.io/editor/?url=shopping.json
- Clickhouse: https://nestia.io/editor/?url=clickhouse.json
- Fireblocks: https://nestia.io/editor/?url=fireblocks.json
- Uber: https://nestia.io/editor/?url=uber.json
- OpenAI: https://nestia.io/editor/?url=openai.json
Backend Setup
Editor Module
import { NestiaEditorModule } from "@nestia/editor/lib/NestiaEditorModule";
import { NestFactory } from '@nestjs/core';
import { SwaggerModule, DocumentBuilder } from '@nestjs/swagger';

import { AppModule } from './app.module';

const bootstrap = async (): Promise<void> => {
  const app = await NestFactory.create(AppModule);
  const config = new DocumentBuilder()
    .setTitle('Cats example')
    .setDescription('The cats API description')
    .setVersion('1.0')
    .addTag('cats')
    .build();
  const documentFactory = () => SwaggerModule.createDocument(app, config);
  SwaggerModule.setup('api', app, documentFactory)

  await NestiaEditorModule.setup({
    path: "editor",
    application: app,
    swagger: "/api-json",
    package: "your-package-name",
    simulate: true,
    e2e: true,
  });
  await app.listen(3000);
};
bootstrap().catch(console.error);
In the NestJS, you can serve the Nestia Editor by NestiaEditorModule.setup() function.
Note that, if you’ve configured the path parameter of the SwaggerModule.setup() function (of @nestjs/swagger) as api, its URL path of the composed Swagger Document is /api-json. Fill the /api-json URL path into the swagger parameter of the NestiaEditorModule.setup() function.
Also, don’t forget to configure the additional properties like package, simulate and e2e for the best experience. Even though these properties are optional, but recommended to be fully filled with the proper values.
package: Name of the SDK package generated in the editorsimulate: Whether to compose mockup simulator or note2e: Whether to compose e2e automated test functions or not